

Deploying a NestJS API to AWS Elastic Beanstalk with CI/CD implementation
Exploring a simple way to deploy a NestJS API on AWS Elastic Beanstalk while implementing CI/CD with AWS CodePipeline


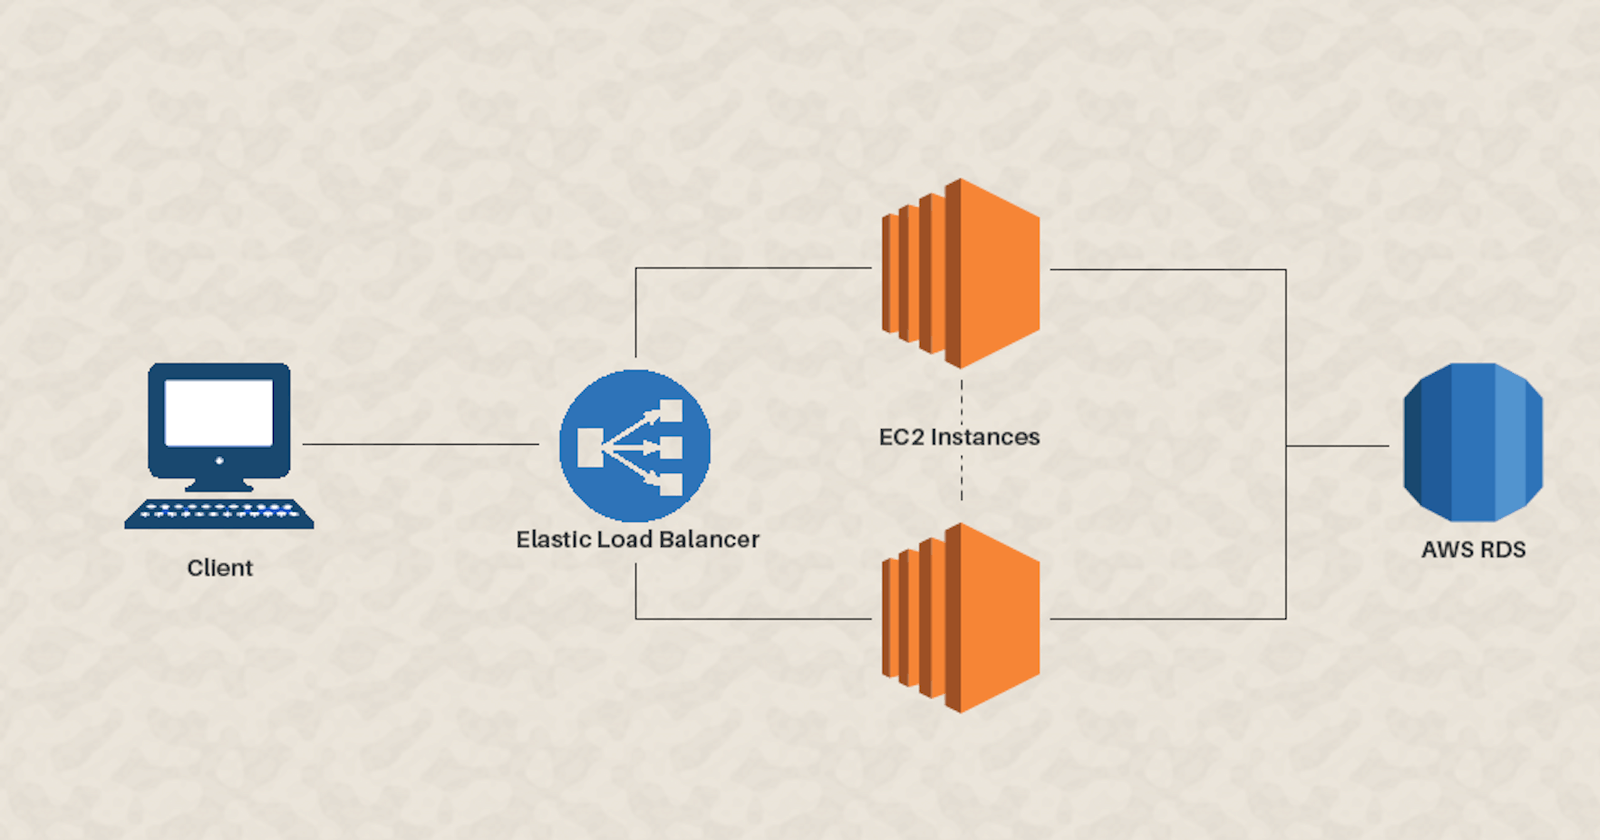
Table of contents
I recently published a hands-on article about building a secure NodeJS REST API with NestJS, in which I showed a simple way of deploying the API built to Heroku.
In this tutorial, we’ll explore a simple way of deploying the same API to AWS while implementing CI/CD (Continuous Integration / Continuous Delivery) practices so that deployment stays smooth for our future releases.
What we’ll use
Let’s quickly outline the tools and services we’re gonna use to deploy our API.
- AWS Elastic Beanstalk: A service for deploying and scaling web applications and services developed with Java, .NET, PHP, Node.js, Python, Ruby, Go, and Docker on familiar servers such as Apache, Nginx, Passenger, and IIS.
- AWS RDS (Relational Database Service): A collection of managed services that makes it simple to set up, operate, and scale relational databases in the cloud. It supports some of the most popular database management systems including PostgreSQL that we’re going to use.
- AWS CodePipeline: A continuous delivery service that helps you automate your release pipelines. It’s the one we shall use to automate the deployment of our app from GitHub to Elastic Beanstalk.
- AWS CodeBuild: A continuous integration service that compiles source code, runs tests, and produces software packages that are ready for deployment. It will be used by CodePipeline to build our code after fetching it from GitHub and before deploying it to Elastic Beanstalk.
For the sake of simplicity, in this tutorial, I chose to deploy our API to AWS Elastic Beanstalk using AWS CodePipeline and AWS CodeBuild; but there are many target AWS services (AWS ECS, AWS EC2, etc.) that we could use to deploy our API and many different ways to go about it (Using GitHub Actions, Jenkins, Docker, etc.).
Let’s get our hands dirty
Step 1: Preparing the project for deployment
You can find the project’s code here. We shall clone it, and create a new branch on which we shall work to prepare the project for deployment to AWS.
After switching to a new branch using git checkout -b awscicd, go to src/database/datasource.ts and update the file such that we use a URL instead of separate database connection parameters (hostname, database name, port, username, and password).
require('dotenv').config();
import { DataSource } from 'typeorm';

export const AppDataSource = new DataSource({
  type: 'postgres',
  url: process.env.DB_URL,
  entities: ['./**/*.entity.js'],
  synchronize: false,
  migrations: ['src/database/migrations/*{.ts,.js}'],
  migrationsRun: true,
  ...(process.env.DB_SSL === 'true'
    ? {
      ssl: true,
      extra: {
        ssl: {
          rejectUnauthorized: false,
        },
      },
    }
    : {}),
});
AppDataSource.initialize()
  .then(() => {
    console.log("Data Source has been initialized!")
  })
  .catch((err) => {
    console.error("Error during Data Source initialization", err)
  });
Next, update the database module such that it looks like the code below:
import { Module } from '@nestjs/common';
import { ConfigModule, ConfigService } from '@nestjs/config';
import { TypeOrmModule } from '@nestjs/typeorm';

@Module({
  imports: [
    TypeOrmModule.forRootAsync({
      imports: [ConfigModule],
      inject: [ConfigService],
      useFactory: (configService: ConfigService) => ({
        type: 'postgres',
        url: configService.get('DB_URL'),
        autoLoadEntities: true,
        synchronize: false,
        migrationsRun: true, // Will run migrations every time the app starts
        migrations: ['dist/database/migrations/*.js'], // Links to the migrations (in /dist because: after build)
        ...(configService.get('DB_SSL') ? {
          ssl: true,
          extra: {
            ssl: {
              rejectUnauthorized: false
            }
          },
        } : {})
      }),
    }),
  ],
})
export class DatabaseModule {}
Inside app.module.ts file, Update the configuration module’s validation schema like below:
import { Module } from '@nestjs/common';
import { AppController } from './app.controller';
import { AppService } from './app.service';
import { ConfigModule } from '@nestjs/config';
import { DatabaseModule } from './database/database.module';
import { UsersModule } from './users/users.module';
import { AuthModule } from './auth/auth.module';
import { TransactionsModule } from './transactions/transactions.module';
import * as Joi from 'joi';

@Module({
  imports: [
    ConfigModule.forRoot({
      isGlobal: true,
      envFilePath: '.env',
      validationSchema: Joi.object({
        NODE_ENV: Joi.string().default('development'),
        DB_URL: Joi.string().required(),
        DB_SSL: Joi.boolean().default(false),
      }),
    }),
    DatabaseModule,
    UsersModule,
    AuthModule,
    TransactionsModule,
  ],
  controllers: [AppController],
  providers: [AppService],
})
export class AppModule {}
Next, in your project root directory, create a buildspec.yml file with the following content:
version: 0.2

phases:
  build:
    commands:
       - npm ci && npm run build # clean install (npm ci) and build (npm run build)

artifacts:
  files:
    - '**/*'
The
buildspec.ymlfile is how we let AWS CodeBuild know which commands to run to build our project.
Then, make sure you have a file named Procfile (with no extension) at the root of your project with the following content: web: npm run start:prod.
AWS Elastic Beanstalk will use the command inside the
Procfileto start our app once deployed.
Once all the above updates are made, you may push the project to GitHub. You may find my implementation here.
Step 2: Sign in to AWS
One needs to sign in to do anything with AWS, right?😇 If you don’t have an account, you may sign up by going to the AWS website and clicking on “Create an AWS account”.
Step 3: Create a database with RDS
Once signed in, type “RDS” on the search bar and click on the first result to open its main page, then click on “Create database”.
You’ll be greeted with a dashboard that looks like this:
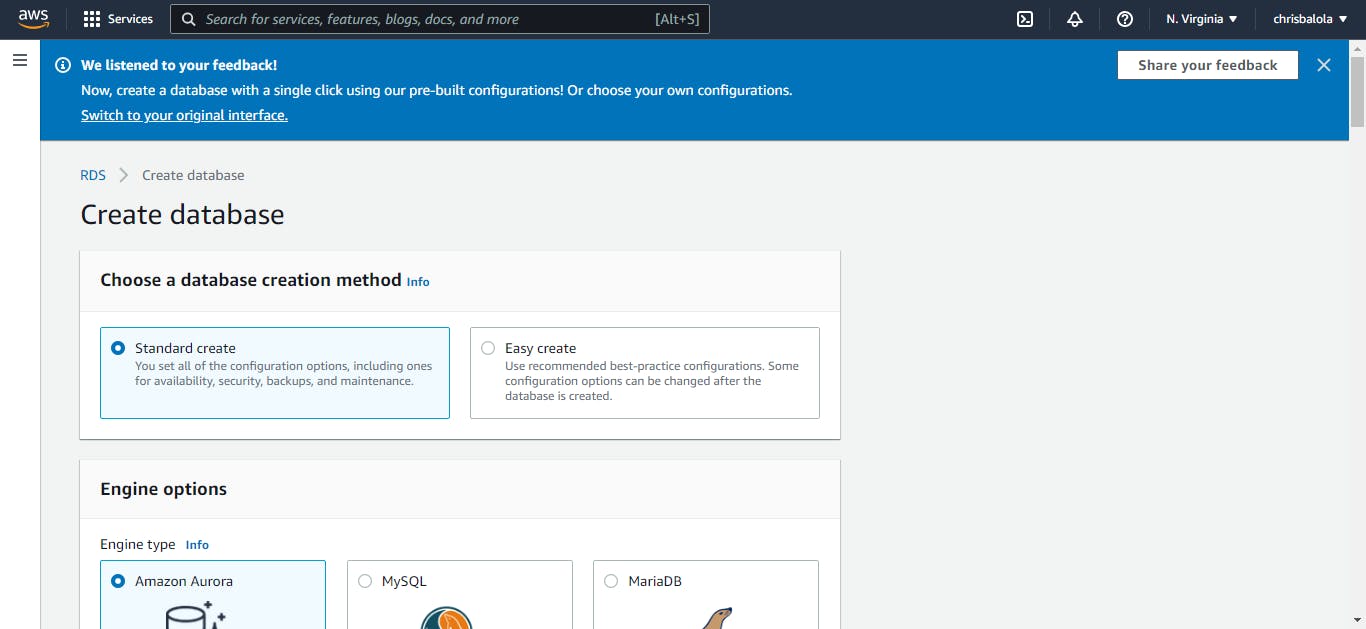
From this page, select “PostgreSQL” as the engine type and select “Free tier” as the template.
Note: Our API’s migrations were generated for a PostgreSQL database. If you choose a different engine, an error will be triggered unless you generate them for the new engine in your local environment. You can also ignore the migrations by setting
migrationsRuntofalseandsynchronizeentities by settingsynchronizetotrue(this is not recommended in production though) in thedatabase.module.tsfile.
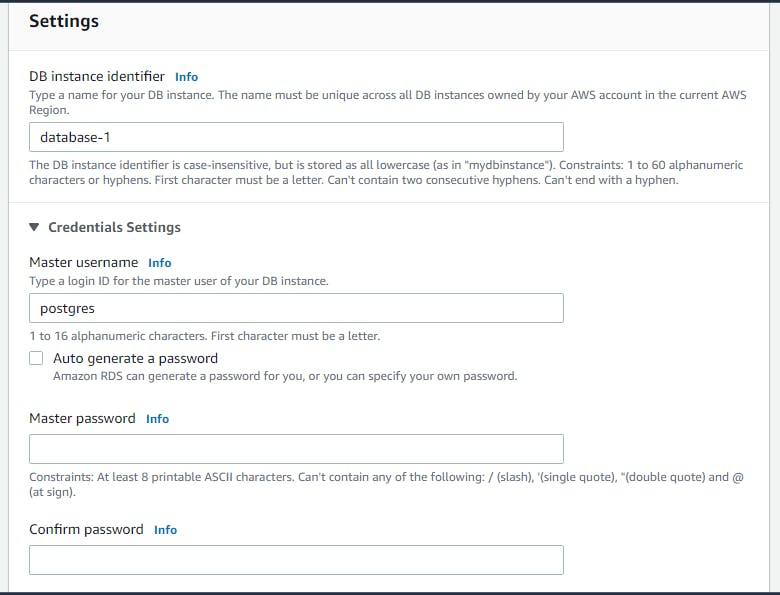
Under settings, fill in the database instance name, and a master username and password (which must be kept somewhere safe).
Next, scroll down to “Connectivity”, and, under “Public access”, select “Yes” to allow the database to be accessible outside its virtual private cloud.
Under “VPC Security Group”, select “Create new” to create a new security group for your VPC (Virtual Private Cloud)’s database instance. Or simply choose one if already created.
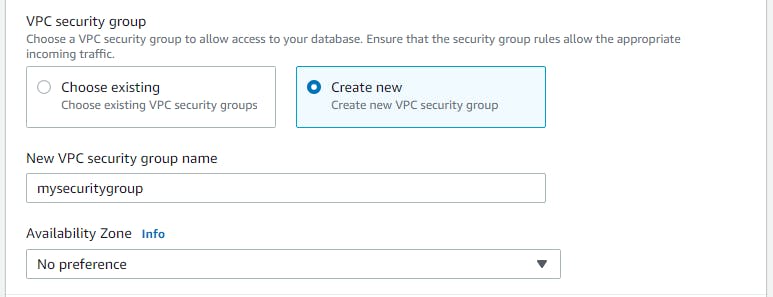
Note: You may also stick to the default VPC security group by selecting “Choose existing” and making sure there’s the default security group there.
Next, scroll down to “Additional configuration”, expand it, and fill in your initial database name like in the image below:
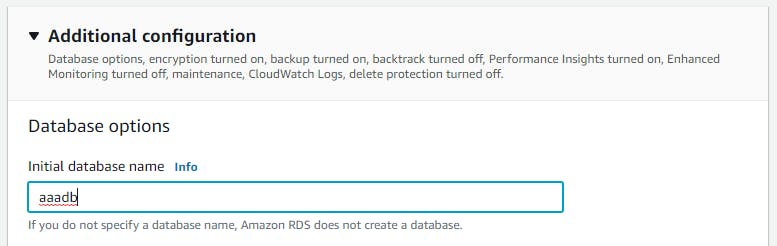
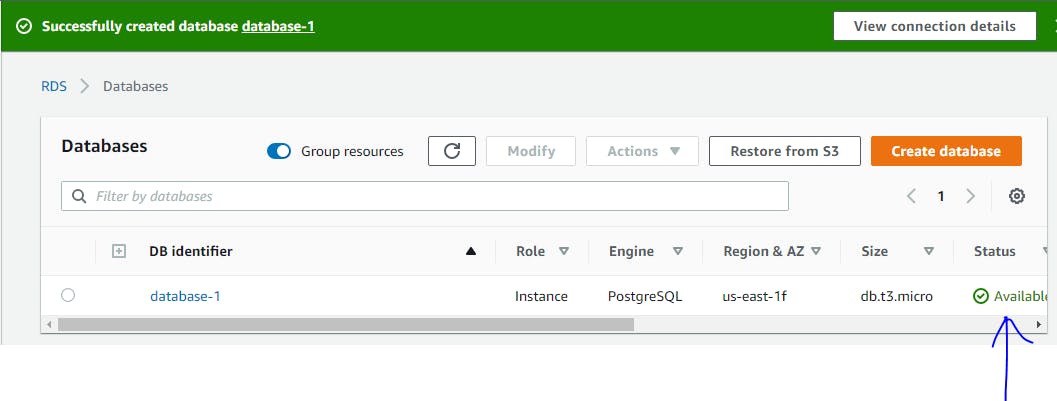
Then click on “Create database” and wait for your database to be ready. You’ll know it’s ready when its status becomes “available”.
Step 4: Update the VPC security group
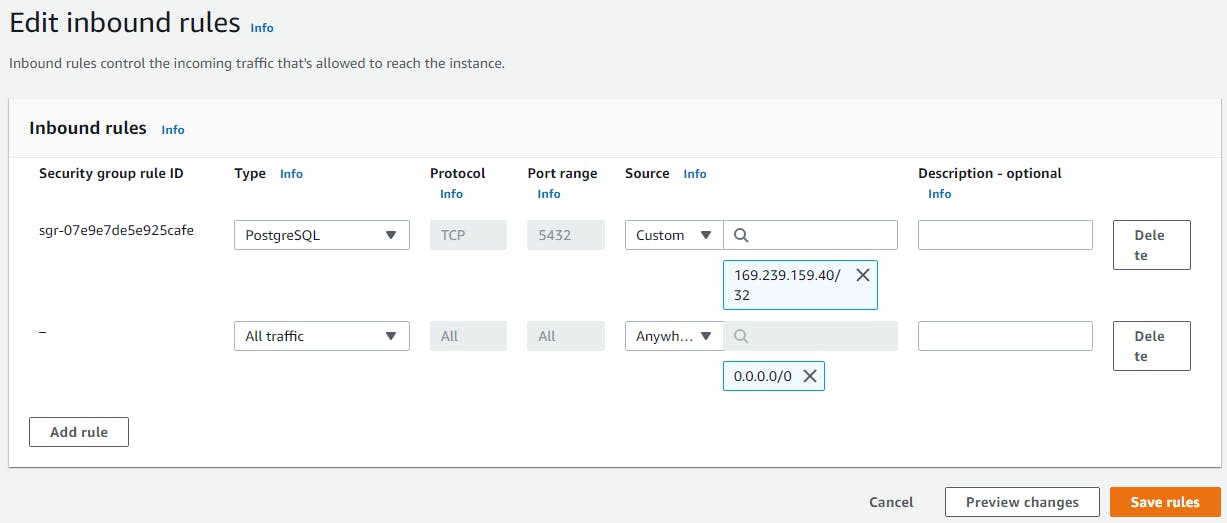
We need to update the database instance’s security group in order to make sure our Elastic Beanstalk application can access it. We do so by adding to it, an inbound rule that allows access from any IP (or a specific one).
Click on the database identifier, then under the “Security” section of the “Connectivity & Security” tab, click on the VPC security group we had chosen when creating our database.

Next, scroll down to “Inbound rules” and click on “Edit inbound rules”. On the page opened, click on “Add rule”, update the added row like on the image below and click on “Save rules”.
Step 5: Create Elastic Beanstalk Application
Type “Elastic” in the search bar and click on “Elastic Beanstalk”. You will be greeted by Elastic Beanstalk’s beautiful welcome page, on which you may locate the “Create Application” button and click on it.
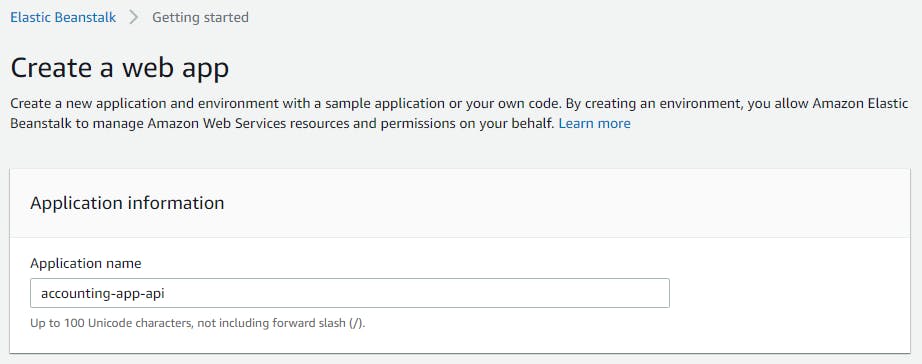
On the page that opens up, fill in the name of the application, scroll down, select “Node.js” as the platform, then click on “Create application”.
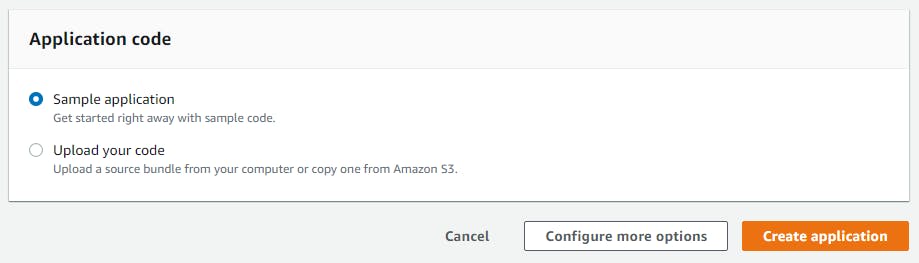
Note: Under application code, we chose “Sample application” to keep it simple, but you can upload your code (zipped) by selecting “Upload your code” instead. That being said, I wouldn’t advise doing so unless you know what you are doing, you may run into problems and Elastic Beanstalk isn’t very good at saying what’s wrong.
Once your application has been created, an environment is created alongside it and a dashboard such as the one on the image below appears:
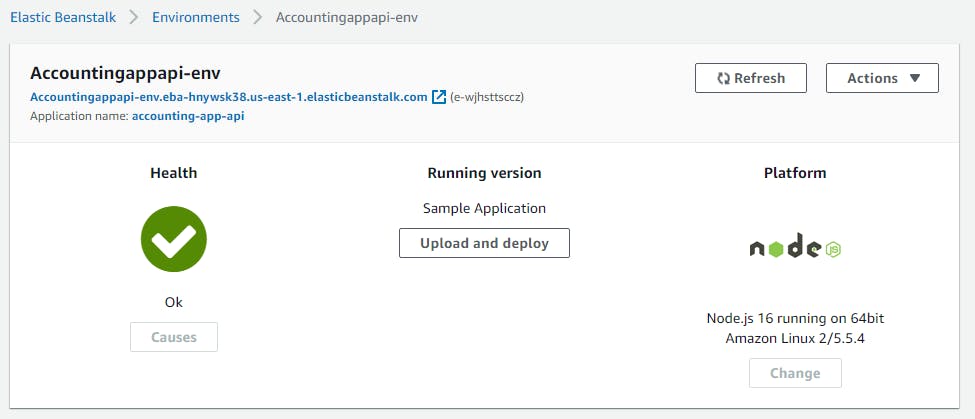
Below the name of the environment, is the link to the application; If you click on it at this stage, you will see the sample app AWS has provisioned for our Elastic Beanstalk application.
Step 6: Update Environment Variables
On the left menu of the Elastic Beanstalk application dashboard, you should be able to see a menu item with the name “Configuration”. Click on it to open the configuration section of the app’s environment.
Next, on the “Software” category, click on “Edit” and then scroll down to “Environment properties”. Fill the environment properties like on the image below then click on “Apply”.
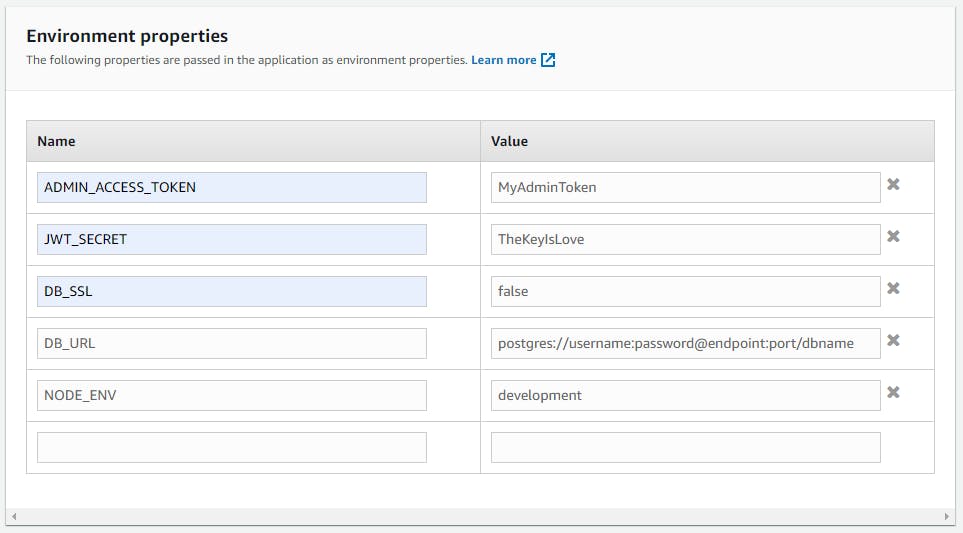
Note: Please take a good look at the database URL’s structure. Replace the username and password with the values you kept in a safe place, and “dbname” with the initial database name as set in step 3.
The endpoint and the port of the database can be found on the database instance’s page which you can find by typing “RDS” in the search bar, clicking on the first result, clicking on databases, then on the name of the database instance. They should be available under the “Endpoint & port” section of the “Connectivity & security” tab.
Step 7: Setup CodePipeline
Search for the CodePipeline service in the search bar and open its page.
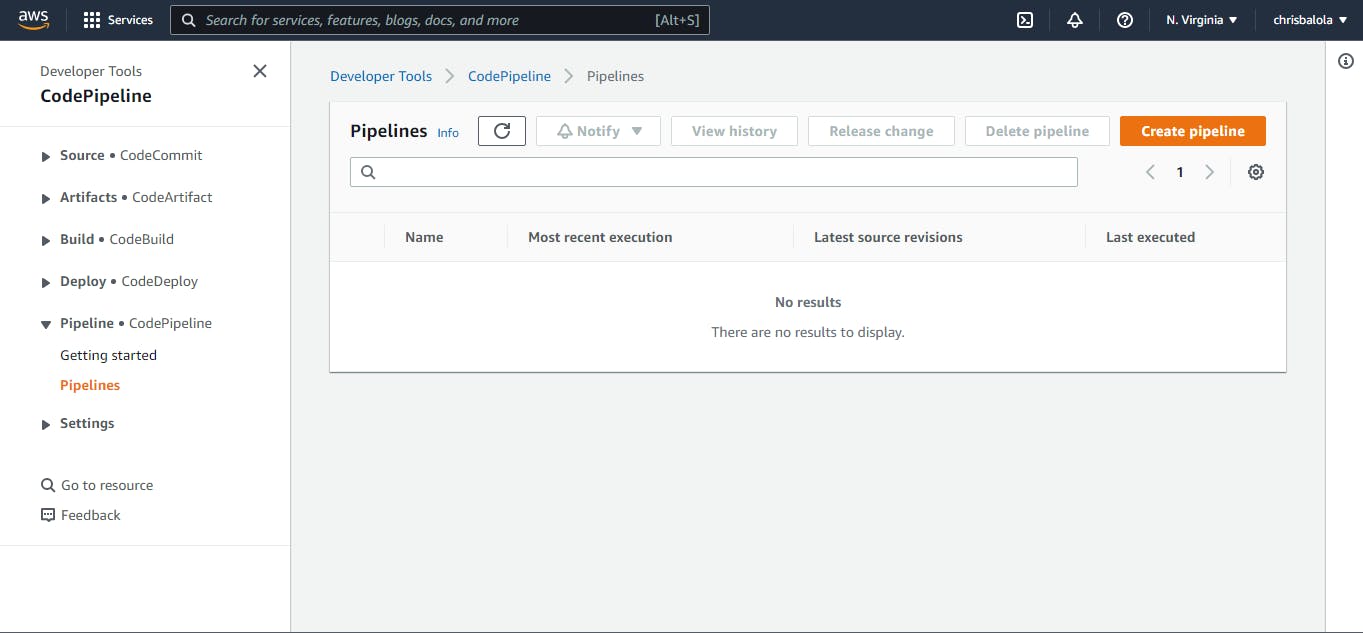
Click on “Create pipeline”, fill in a name for the pipeline (Eg: accounting-api-pipeline), then click on next.
At the “Source stage”, select “GitHub (Version 2)” as the source provider. You will see a page like the following:
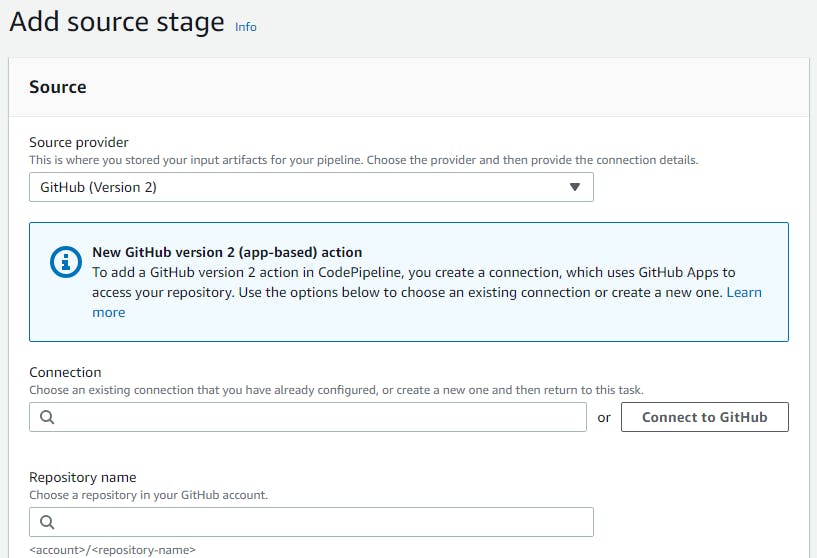
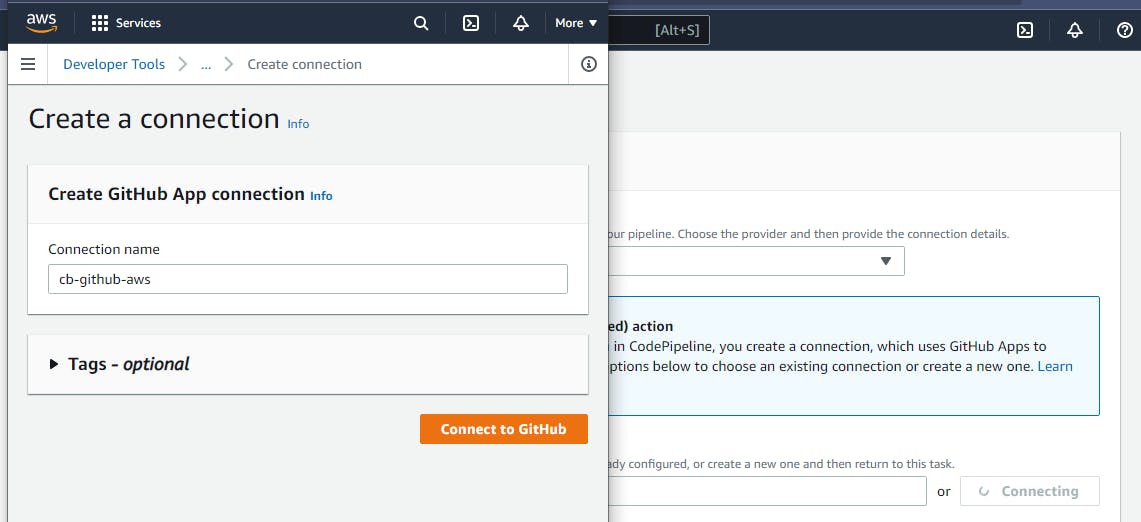
Assuming you don’t already have a connection, click on “Connect to GitHub”, fill in a name for the connection in the opened window like in the image below, then click on “Connect to GitHub”.
A page where you can either select an app or install a new GitHub app will open. Click on “Install a new app”.
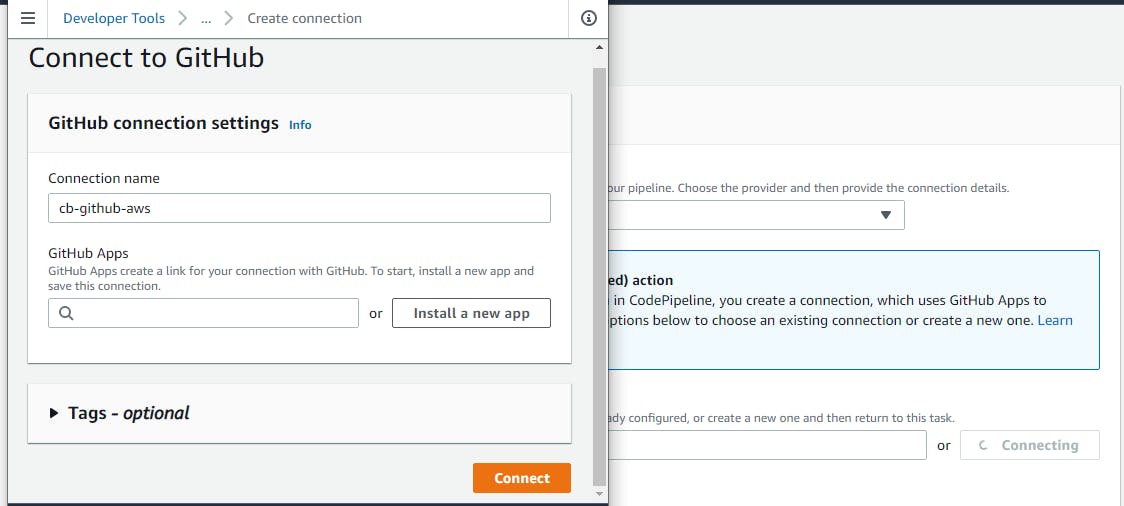
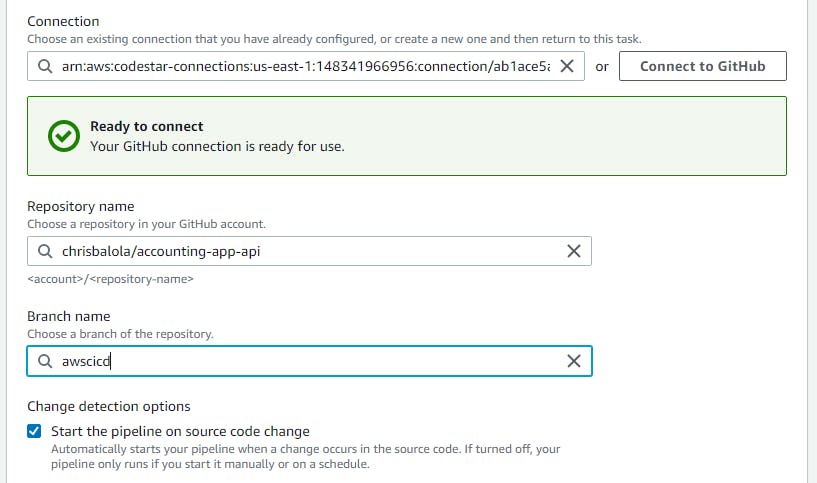
You will be redirected to GitHub, and from there you can select which repositories your AWS pipeline will be able to access on your GitHub account via this connection. Once an app has been installed, click on “Connect”; the window will close and you may get back to the pipeline creation page on which you may select the name of the repository to pick the code from and the branch.
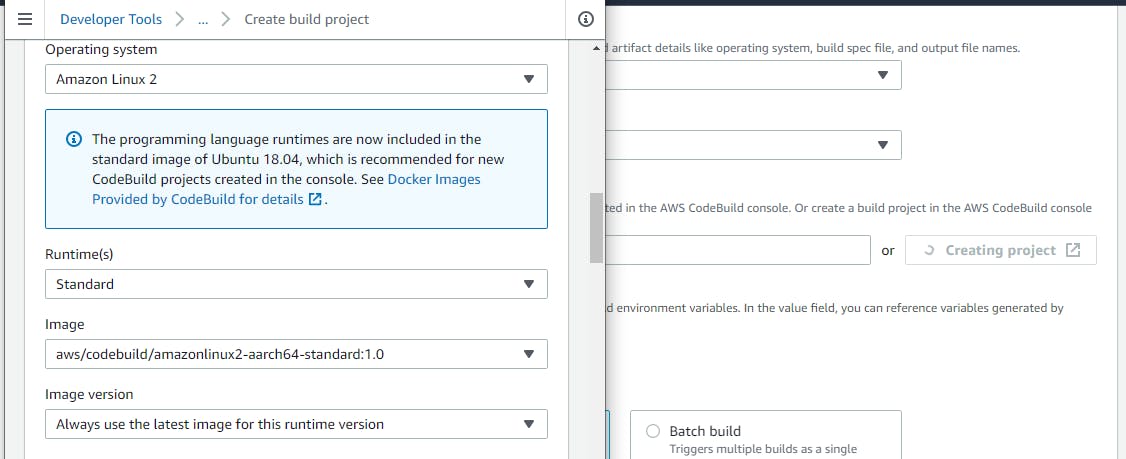
That being done, click on “Next”, and on the “Build stage”, select “AWS CodeBuild”, then click on “Create project”. It will open a new window like in the image below:
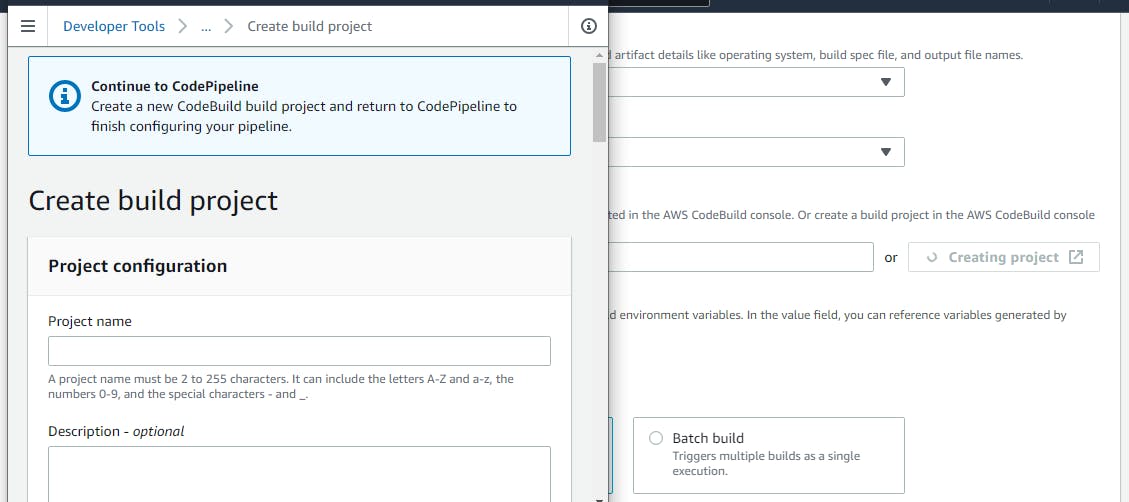
Simply fill in a name for the “Build project” and select the operating system, the runtime, and the image, then scroll down and click on “Continue to pipeline”.
Once the “Build project” is selected, click on “Next”, then on the Deploy stage, select “AWS Elastic Beanstalk” as the deploy provider.
Two input fields will appear where you will select the application’s name and the environment to deploy to.

Click on “Next” and you should be able to see a summary of all the stages as configured. You may then click on “Create pipeline” to create the pipeline.
Note: Once created, the pipeline will immediately initiate a release from GitHub, build it, then deploy it to your AWS Elastic Beanstalk application’s environment.
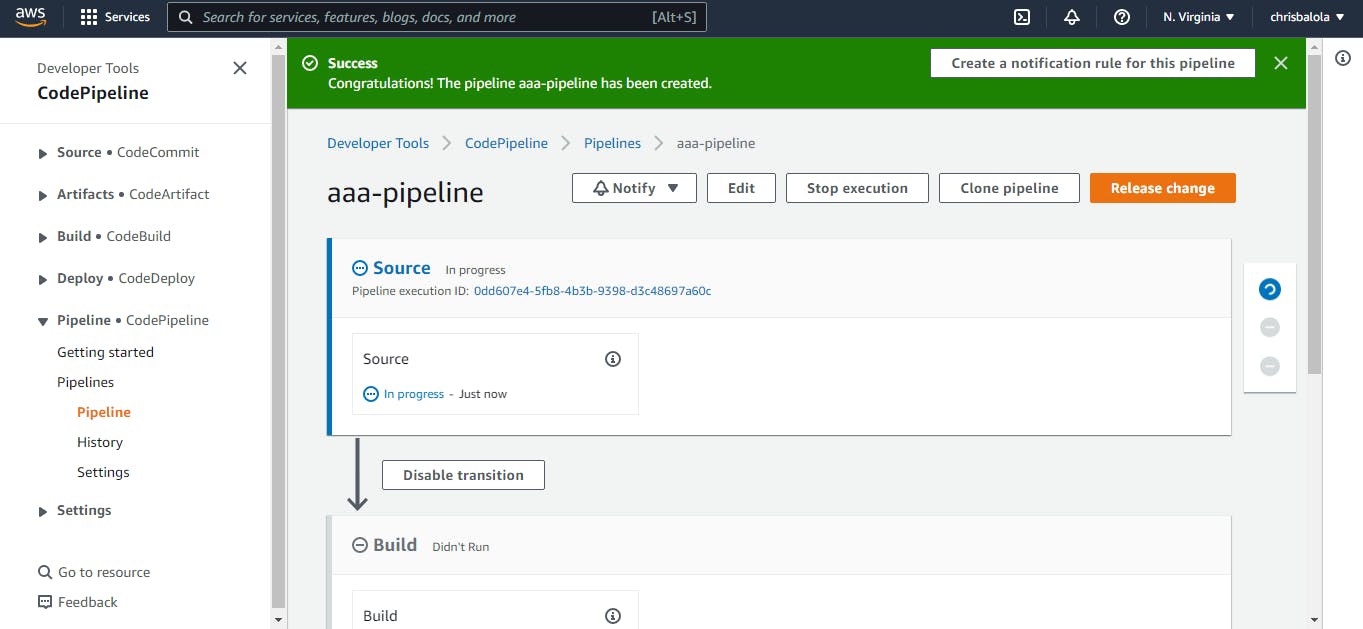
This is the page to monitor your pipeline from. You can always find it in your console by searching for “CodePipeline”, clicking on “pipelines” and then selecting the name of the pipeline you want to inspect.
As you may see, the dashboard shows you the status of each stage and the last time it changed. You may initiate a release by clicking on “Release change”. You would probably not need to do it since AWS will be doing it for you every time there’s a change on the GitHub repository’s branch that you connected to your pipeline.
Once the deployment is done, the Elastic Beanstalk app will start the Nest app and run migrations while at it.
Note: Browser seems to load the Swagger UI page’s resources through
https, yet we haven’t added a certificate to our Elastic Beanstalk application. That and the fact that Swagger UI is served via redirection of its resources to a specified path, may explain why Swagger UI page does not display on some browsers. The easiest solution for this is to addhttpsto our application (a tutorial for another time).
That being said, our Elastic Beanstalk app can already receive requests at the endpoint specified on its main page.
Debugging failure
From now on, if you make changes to your code, push it to the GitHub branch that’s connected to the AWS pipeline and it will trigger continuous integration and deployment of the app to AWS Elastic Beanstalk.
However, a failure can happen at any stage of the CI/CI process, most likely the “Build stage” of the pipeline, the “Deploy stage” of the pipeline, and the elastic beanstalk app stage.
If the error occurs at:
- The pipeline’s “Build stage”: On the pipeline’s page, under the “Build” section, click on “Details”, and read the “Build logs” to find out what happened.
- The pipeline’s “Deploy stage”: Under the “Deploy” section, near the text that displays the last release time, there should be a text that you can click on, and it will redirect you to a page where you can read the cause of the error.
- The app level: The Elastic Beanstalk application’s dashboard may display the state of “Health” as “Warning” or “Degraded”. To find out what may have caused the app’s failure, click on “Logs” on the left menu, then on “Request Logs” select “Last 100 lines”. On the logs row that appears, click on “Download” to read them. In the logs page opened, you may want to focus on the ones under the section
/var/log/web.stdout.log.
Conclusion
As a software developer, it’s very important to get familiar with cloud providers like AWS, not only because of the numerous advantages they provide (flexibility, scalability, etc.) but also because they are included in the tech stack of numerous large companies.
This tutorial is my way of showing you a simple entry point to the world of cloud providers, especially AWS; but just like every entry point, they require you to go deeper or you’ll stay stagnant.
More tutorials will come, but in the meantime please read more about AWS, and feel free to get in touch with me in case of anything. I’m often available on Twitter, GitHub, and LinkedIn.
Kind Regards,
Christian.